PUNCTURE REPAIR
The greatest disadvantage of inflatable tires is the inconvenience of punctures. Nobody plans for punctures; this is why a cyclist should learn how to repair a puncture. At first, this essential skill may appear as a daunting task, but after reading this article, you will gain the necessary knowledge to master the skill.
Punctures are the result of damage inflicted on the inner tubes. Sharp objects like nails, broken glass and sharp objects like thorns and pointy rocks are the most common causes of tire punctures. There are two types of bicycle tire punctures; point punctures and snake bite punctures. Point punctures appear like pin-hole forms on the tube. Point punctures are caused by sharp pointy objects like nails, thumbtacks, pins or other sharp objects. Sometimes, a point puncture may be hard to notice as air oozes gradually from the tube.
Snakebite punctures are also known as pinch punctures. When you hit a pothole or ride over a rock on a tire with insufficient pressure, the tire compresses causing the tube to make contact with the tire and the rim. When the rim pinches the inner tube, it tears the tube on the two contact spots, hence the name; snake bite punctures. In most circumstances, snake bite punctures are severe and hard to repair. It is recommended that you get a new inner tube to replace a pinch puncture. You can avoid snakebite punctures by riding on the right tire pressure.
Tools required for a puncture repair
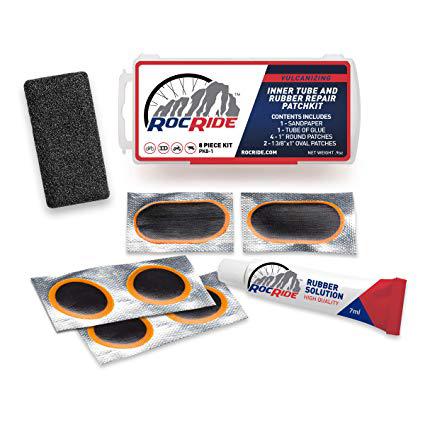
A good tire repair kit should have the following items:

◦ Tire Levers
◦ Sandpaper
◦ Patches
◦ Glue
◦ A bicycle pump
HOW TO REPAIR A PUNCTURE ON AN INNER TUBE
- Remove the inner tube

Detach the punctured wheel from the fork. If there is a significant amount of air in the tube, deflate the tire by loosening the valve. Use two tire levers to uninstall and expose the inner tube. All you need to do is to detach the tire from the rim on one side of the wheel. Pull out the inner tube but let the valve in its place.
- Find the puncture
To locate the hole on the tube, you will have to inflate the punctured tire with your pump. Listen keenly for any sounds along the surface of the tube. Tire punctures manifest in different degrees and sizes. Tiny holes do no produce sound, and you may have to dip the inflated tube in a trough of water to locate the puncture. Check for air bubbles. Mark the puncture with a marker or chalk.
- Find the cause of the leak
In step 2 above, we did not completely remove the tube. The reason for this is so that we may find the cause of the puncture. Now that you know the location of the puncture, align the tube along the rim. Check the area of the tire that coincides with the hole for any sharp objects that may still be poking onto the inner surface of the tire. Remove the sharp object (if you found one).
- Apply glue
You know the location of the puncture, the next step would be to seal it. If your tube is dusty or dirty, you would want to wash the area around the hole first. Water and dirt interfere with the adhesive characteristics of the patch; this is why the surface marked for patching has to be clean and dry. Dry the marked area and apply the glue. Use the sandpaper to rub the surface around the puncture. This helps the patch adhere to the tube. How do you know how much glue to apply? Tire patches come in different sizes. Pinch punctures require larger patches than point punctures. The size of the puncture determines the size of the patch. The gluing surface should cover at least the area of the patch you can spread the glue over a larger area to stay safe. Depending on the instructions on the package of the glue, wait for it to dry. Usually, it takes 1-5 minutes.

5. Patch-up
Carefully detach the patch from its foil wrapper. Carefully place the patch over the hole. Press the patch firmly onto the tube with your finger or a blunt and hard object. This helps eliminate any air that may be trapped between the patch and the tube. Give the patch a few minutes to stick to the surface of the tube. Remove the plastic wrapper of the patch gently. You can inflate the tire and pass your newly patched tube through a trough of water. This will help you check if the patch holds well, or if you acquired any new punctures while you were fixing your tube.
- Install your tire
Deflate your tube and tuck it inside your wheel; over the rim, under the tire. When installing the tube start by fitting the valve into its place then work your way around the rim. Gently tuck your tire into the clinchers of the rim until it is physically impossible to proceed further. Use the tire levers to pop the remaining section of the tire into the clinchers.
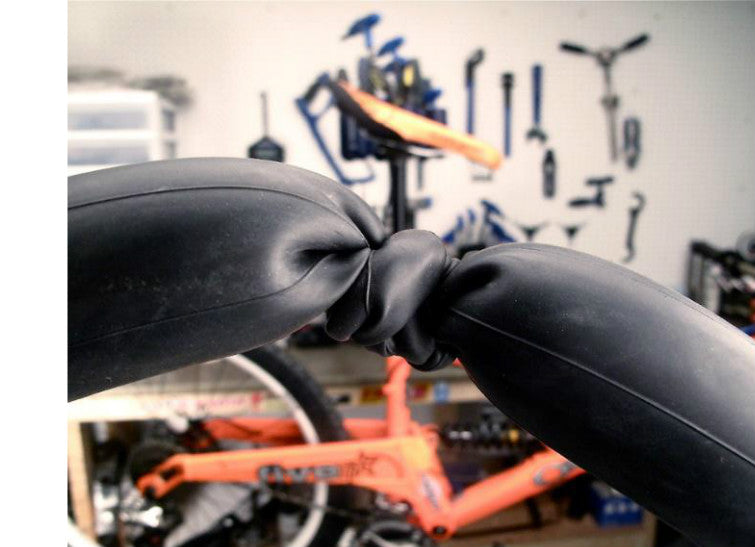
 No one plans for punctures. On a pleasant afternoon hike, you may get a flat tire. You are far away from home and your tools; what do you do? You can use flat blade screwdrivers or flat-ended crowbars as substitutes for tire levers. Ideally, you are supposed to ride around with some patches; but what happens when you do not have your patches. You can tie a knot around the punctured surface of the tube. This is not safe, but it will buy you time until you get access to your tools.
Inflatable tires are cheaper than tubeless alternatives. As a consequence of saving money, you have to live with the fact that your tires are susceptible to puncture. You may never gain immunity, but you can reduce the chances of suffering a puncture by riding in the right tire pressure, avoiding potholes, and driving on a clean road.
Gain the skill, stay safe, and enjoy your ride.


